Hello! Today I want to discuss my creative process for custom design boards. I want to start this piece with a preliminary statement that we are all different and have different ways we process our creativity. This is my way of creating design boards, it might give you some tips or pointers on how to expand on your existing process, or it may not help at all, there is no “right way” when it comes to creativity! I am an artist with unofficially diagnosed OCD (you can ask me more about that if you’re curious), and my OCD manifests itself through intense regimen. I am also not particularly tech-savvy and I would not be surprised if there are programs that could make this simpler. However, I will let you know that you do not need any fancy technology to create beautiful design boards as my process is completed using Google, MS Word, Canva and Paint.
It all begins with our ten-page Client Questionnaire. This includes questions that seem obvious to ask such as:
- What are your top three priorities for your wedding day?
- What style do you envision for your wedding? Here are some sample key words to choose from…
- What colors would you like to see on your wedding day?
However, over the years, we have cultivated our style as designers to be reflective of the couples/clients. We have therefore added a lot of questions that seem irrelevant to an event, but they are crucial in allowing us to learn more about who they are as a person.
- What do you do for relaxation?
- What is your favorite thing in your home?
- What song lyric or poem moves you the most/relates to you as a couple?
This helps us begin to envision unique elements that represent the couple and also allows us to, often right away, know which vendors will be the perfect match for them!
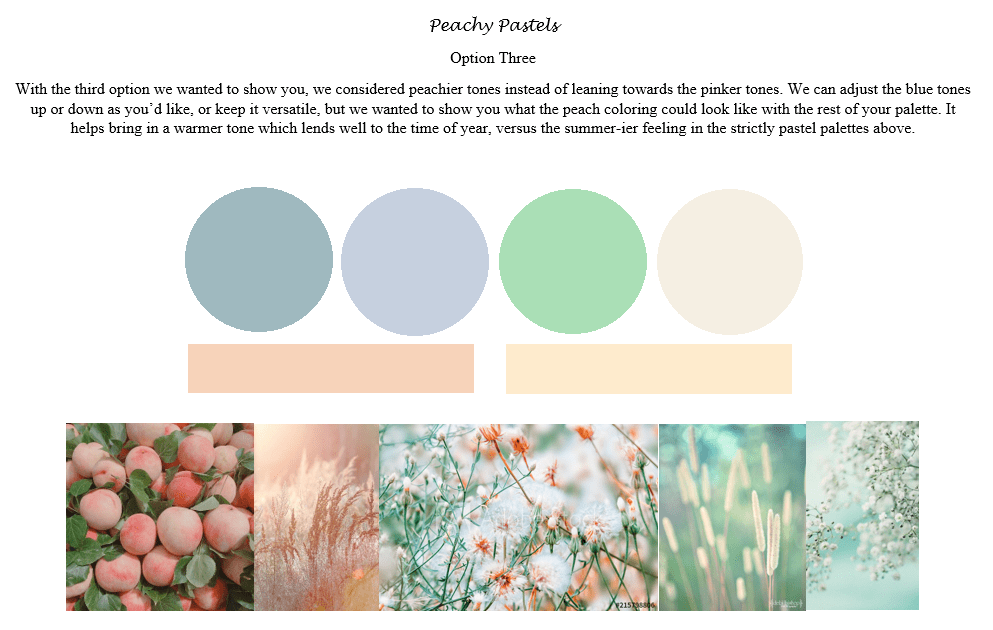
Step two is brainstorming color palettes that represent the colors/vision they describe in their questionnaire, but also additional color palettes that we would love for them to consider. This can be very similar to their original intention with perhaps a pop of color, or something totally out of the box we’d love for them to consider.
From here, step three is to actually make their custom color palette. If the couple wanted something fairly natural to the environment, a lot of blues and greens, it begins with a simple Google search for “blue and green color palettes,” which I peruse for inspirational combinations or images. This is how I seek out different tones and shades which could be a match for what the couple is looking for. I build the color palette in Paint, using the Color Picker tool. Mixing and matching tones and colors. This can sometimes come together very quickly or take several tries. It’s also an easy tool to use to tweak one shade/tone if the client asks for a “grayer blue” or a “more olive green” without having to start over from scratch. You can also utilize tools like HTML Color Codes if you are struggling to find exactly what you’re envisioning, or if you are trying to find the match you may use down the road with your stationer for paper goods! I have included some sample color palettes for you to see here.
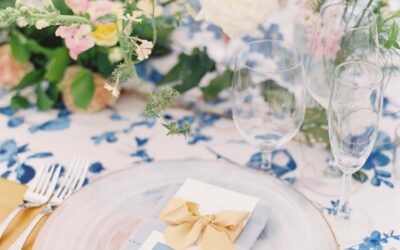
Before delivering the color palettes to the client, however, I search for additional imagery that is representative of the palette. This helps to visualize a wider range of those colors, and I tend to seek the colors out in nature, to further help visualize how it can be integrated into their actual event. After submitting colors to the client, there is an active conversation during the selection process, and often colors are adjusted. However, once the final palette is chosen, we submit it to the client’s florist, stationer, lighting designer and whoever else may be involved in design so that they have a base from which to jump off from for their designs.
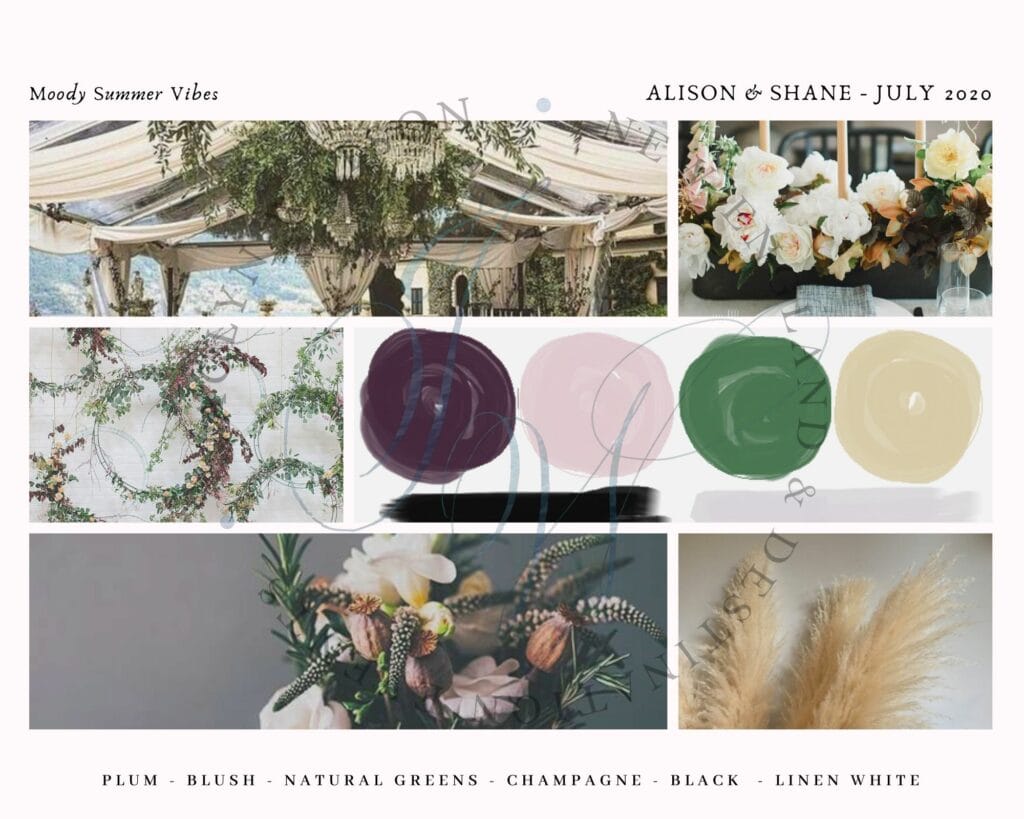
Step five comes in after a color palette is finalized. I recreate the color palette using Canva (referencing Moody Summer Vibes board) to be representative of their colors and their event’s aesthetic. We also expand on the design board from here to be inclusive of their rental selections and additional design elements in order to deliver a fully encompassing design board as a reference for the client, and all the vendors.
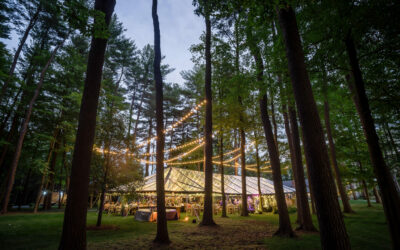
This board may expand, or mildly adjust, over the rest of the design process, but after these selections, it is often completed and placed into their binder as a paper design until the day of their event when it all comes to life!
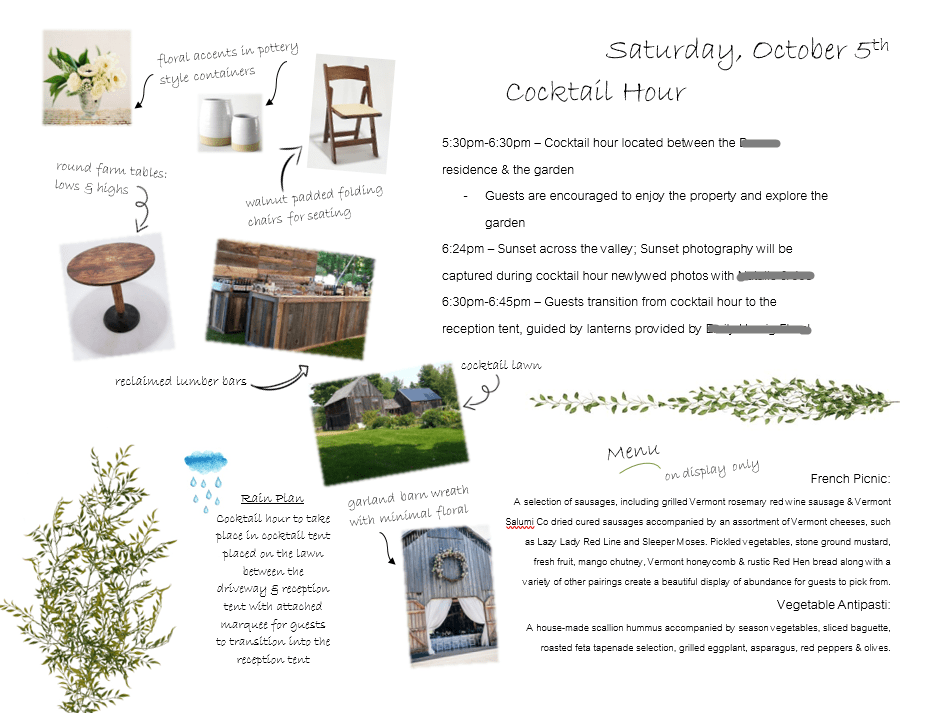
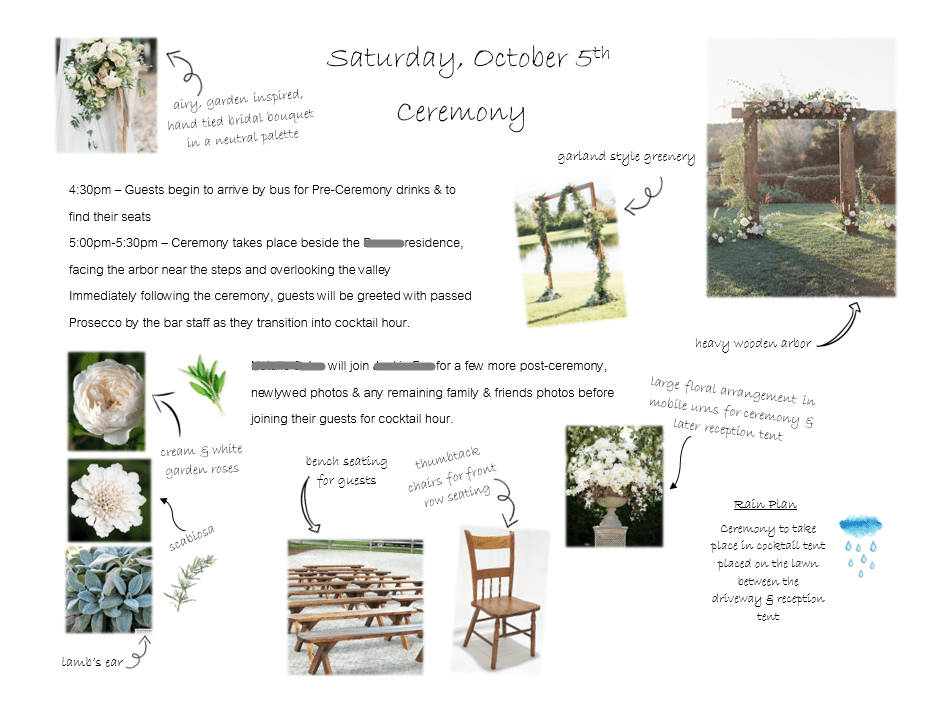
On occasion, the finalized design board may evolve into a storyboard that includes the event’s complete logistics. This is everything from the design elements previously discussed, all rentals, menus for each section of the event, including multi-day events, timing and logistics, specific botanicals utilized in each section, and the list goes on! This extra step is especially helpful for events that are logistically difficult, are design-heavy or to simply help provide a more in-depth look at what is sometimes hard to imagine from a collection of emails. It is important to remember that it is not always simple for someone to read a description and visualize a design from that. It is also important to remember that descriptive words may mean one thing to you and something different to me.
For myself, the Google images search at the beginning is absolutely key to my inspiration. Without finding an image that represents my vision, I may struggle to piece together a design board, and I cannot go outside of this creative process. I have sat on designs for weeks before until the right image comes across my desk and triggers a snowball effect that allows me to piece together the right colors, which leads me to the right linen selections and so on and so forth. Over the years I have attended many design classes through conferences such as Catersource and The Events Show or put time and research into studying incoming trends in fashion and interior design. As designers, as artists, it is important to continually feed ourselves with inspiration, whether that’s through classes, research or creative hobbies other than event design, it helps to keep us fueled for our clients!
Finally, I want to say, once more, that there is no right way, this is just my way, and I’d love to hear about your way! What inspires you? Do you have any tactics to deal with an artistic slump? What creative hobbies do you have outside of event design? Let’s open up a discussion about this and maybe we can each walk away with some new tip or trick to try out in the future!
xoxo
Stephanie
JWE Wedding Planner